

How to Layer Necklaces: A Beginner's Style Guide
Three necklaces, staggered lengths, one focal piece. That’s the whole recipe for layering necklaces that actually looks intentional. A starter stack of 16, 18, and 22 inches gives each chain its own plane so nothing bunches, and mixing at least two different chain textures keeps the eye moving across the look rather than getting stuck.
Two stacks you can copy right now:
- Everyday: A 16-inch beaded choker + 18-inch delicate cable chain + 22-inch pendant necklace. Clean, minimal, works with a white tee or a crewneck sweater.
- Dressy: A 16-inch snake chain + 18-inch gold druzy drop pendant + 22-inch fine rope chain. The pendant does the heavy lifting; the other two frame it.
One tradeoff worth knowing: every chain you add increases the risk of tangling. For three or more delicate chains, a necklace spacer keeps them separated at the clasp and saves you five minutes of untangling every morning.
Key Takeaways
Layering necklaces works best when spacing, texture contrast, and chain weight are treated as a system, not an afterthought — get those three right and the aesthetic follows.
Table of Contents
- How do you build a layered necklace stack step by step?
- Which chain types and textures work well together?
- How do you mix metals and chain weights without looking messy?
- How do necklace lengths match different necklines and outfits?
- How do you stop necklaces from tangling, and how should you care for them?
- Seven layered looks you can copy today
- What should you look for when buying necklaces for layering?
- Diamondsbydaisy curated layering picks that follow the recipe
- The one thing most layering guides get wrong
- Ready to build your stack with Diamondsbydaisy?
- Sources
How do you build a layered necklace stack step by step?
A numbered checklist beats vague advice here. Work through these five steps in order and you’ll have a wearable stack in under ten minutes.
- Pick your base chain (14–16 inches). This sits closest to your collarbone. A dainty cable, bead, or snake chain works best because it lies flat and doesn’t compete with what comes next. If you have a petite neck, 14 inches is your sweet spot.
- Add a focal mid-layer (17–18 inches). This is where a pendant or charm lives. It should be the most visually interesting piece in the stack — a stone drop, a charm, or a shaped pendant. One strong focal piece is enough.
- Add a long anchor chain (20–24 inches). This creates depth and visual weight at the bottom. A rope, curb, or paperclip chain reads well here because the texture contrasts with the finer pieces above.
- Check your spacing. Aim for roughly 2 inches between each length. That gap is what keeps chains from settling into the same spot and tangling. Petite necks should subtract about 2 inches from each suggested length; deeper necklines or larger necks can add 2 inches.
- Secure and do a final fit check. Fasten the shortest chain first, then work outward. Tug each chain gently to confirm it sits in its own lane. If two chains keep migrating toward each other, consider a spacer or swap one length.
Which chain types and textures work well together?
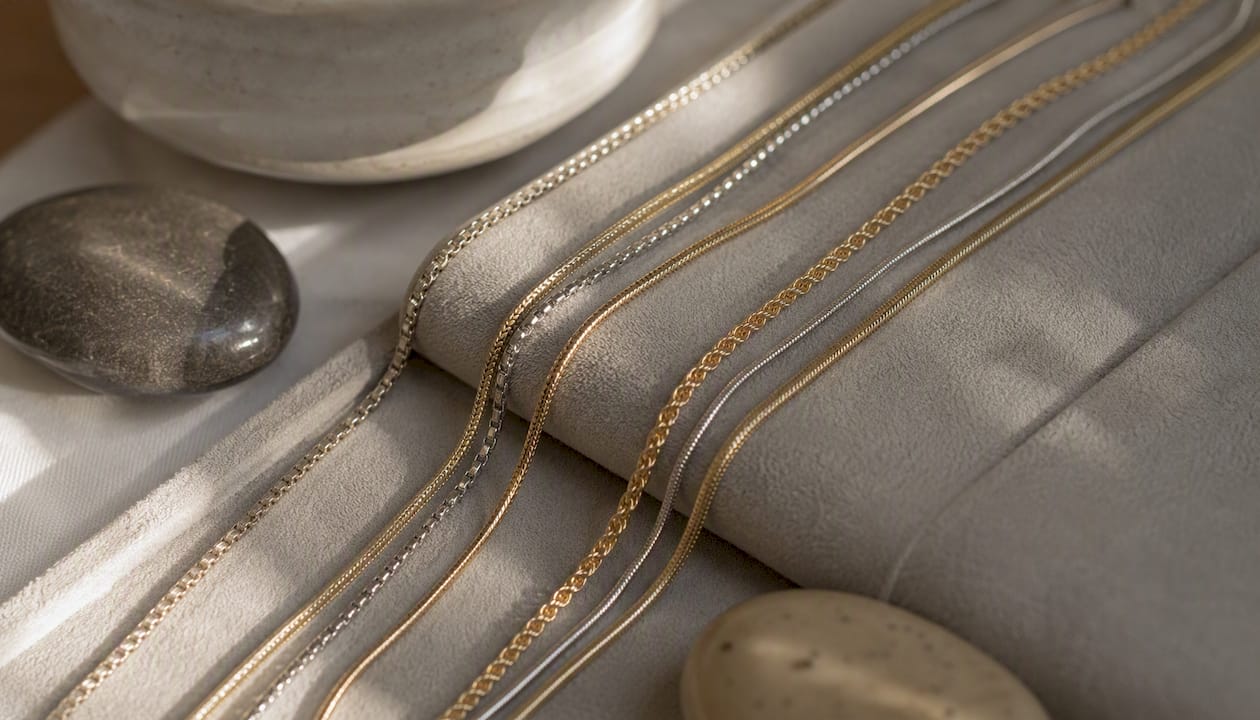
Chain profile matters more than most people realize. Two identical fine cables layered together look like one chain from across the room. The goal is contrast: each piece should read separately at a glance.
Here’s how the most common chain types behave:
- Cable chain: Classic interlocking oval links. Reflects light evenly, pairs with almost anything, and lies flat. A reliable base or mid-layer.
- Box chain: Square links create a smooth, ribbon-like surface. Slightly more structured than cable; holds pendants cleanly without twisting.
- Rope chain: Twisted strands that catch light from multiple angles. Adds texture and visual weight. Works well as a long anchor layer.
- Curb chain: Flat, interlocking links that lie flush. Heavier and bolder than cable. Good for a statement long layer or a mixed-metal accent.
- Paperclip chain: Elongated rectangular links with a graphic, modern look. Pairs well with dainty chains because the contrast is immediate.
- Snake chain: Smooth, flexible, almost liquid-looking. Lies flat and reflects light like a ribbon. Pair it with a textured rope or beaded strand for maximum contrast.
- Beaded or pearl strand: Adds softness and a different material entirely. A pearl strand at 16–18 inches alongside a metal chain creates a mixed-material stack that reads polished rather than precious.
Mixing textures like cable, rope, and box chains is the single most reliable way to make a stack look intentional. The practical pairing rule: put one flat chain (snake, box) next to one textured chain (rope, beaded) and the contrast does the work. Avoid stacking multiple fine identical cables — they tangle easily and visually merge into one.
How do you mix metals and chain weights without looking messy?
Mixed metals work when there’s a clear dominant tone. So a mostly gold stack with one silver or oxidized piece reads deliberate. A 50/50 split tends to look unresolved.
A few rules that hold up in practice:
- Place heavier chains lower. A thick curb or rope chain worn above a delicate choker will drag the lighter piece upward and cause tangling. Weight belongs at the bottom of the stack.
- Keep the focal pendant at mid-length. A statement piece at 17–18 inches sits in the visual center of the stack. Putting it at the longest layer buries it under the other chains.
- Single-metal stacks are easier for beginners. An all-gold or all-silver stack with varied textures is harder to get wrong than a mixed-metal stack. Once you’re comfortable with spacing and texture, layer in a second metal.
- Avoid mixing very heavy and very delicate chains at the same length. A chunky curb chain and a fine cable at the same length will constantly tangle because they occupy the same plane.
What makes a stack look messy is usually not the metal choices — it’s chains that are too close in length. Get the spacing right first, then experiment with metals.
How do necklace lengths match different necklines and outfits?
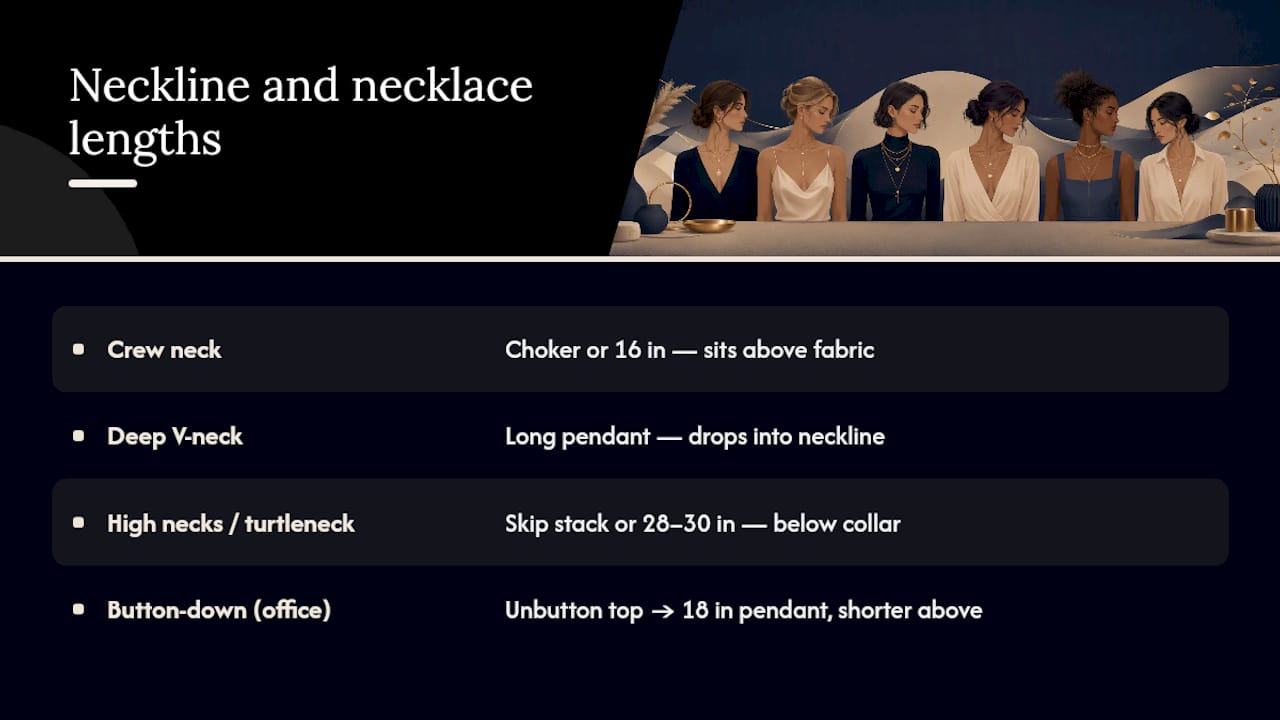
The neckline determines where your base chain should sit, and everything else builds from there. A crew neck calls for a choker or 16-inch chain that sits above the fabric. A deep V-neck opens up space for a longer pendant to drop into the neckline. High necks and turtlenecks are the exception: skip the stack entirely or wear one long chain (28–30 inches) that falls below the collar.
For office looks, unbuttoning the top button of a button-down creates a natural V-shape that frames a pendant at 18 inches with a shorter chain above it. It’s a small adjustment that makes the stack visible without reading as overdressed.
Two outfit pairings worth copying: a white scoop-neck tee with a 16-inch bead chain, an 18-inch coin pendant, and a 22-inch fine rope chain reads effortless for a weekend. For an evening look, a silk slip dress with a 16-inch snake chain, an 18-inch druzy drop, and a 22-inch gold rope chain adds texture without competing with the fabric.
How do you stop necklaces from tangling, and how should you care for them?
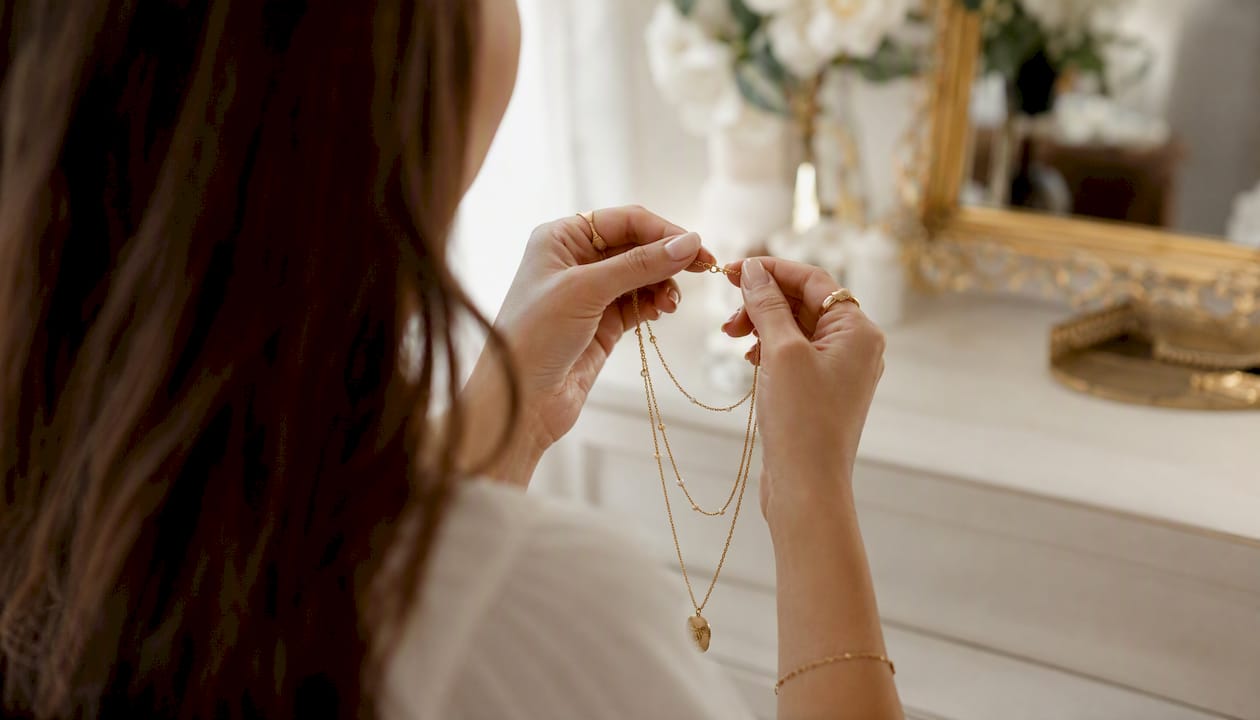
Spacing chains at least two inches apart and varying texture and weight are the two most reliable anti-tangle strategies. Everything else is secondary.
Anti-tangle rules:
- Keep 2-inch gaps between lengths so chains rest on separate planes.
- Use a necklace spacer when layering multiple delicate chains. Spacers have small rings and a shared clasp to hold each chain in its own lane. Match the spacer metal to your chains to avoid plating wear.
- Vary chain weight: a heavier chain below a lighter one stays put; two chains of identical weight drift toward each other.
Care checklist:
- Store each necklace separately, ideally hanging on a hook or in individual pouches. Tossing them together in a drawer is the fastest way to create knots.
- Apply perfume and lotions before putting on your necklaces, not after. Chemicals in fragrance and skincare accelerate tarnishing on sterling silver and gold vermeil.
- Clean with a soft cloth after wearing, especially if you’ve been active. Sweat speeds up oxidation.
- Check clasps regularly. A clasp that feels loose should be replaced before the chain is lost.
On clasps: For chains and pendants heavier than about several grams, a lobster clasp is generally more secure than a spring ring. Light daily motion on a layered stack stresses clasps more than expected, and a spring ring on a heavier piece may fail eventually.
Pro Tip: Fasten your shortest chain first, then add each subsequent chain working outward. This order keeps the chains from crossing at the back of your neck and dramatically reduces the knotting that happens when you put them all on at once.
Seven layered looks you can copy today
These seven stacks cover the main occasions. Each one follows the length-spacing and texture rules above.
- Everyday minimal (2-piece): 16-inch bead chain + 20-inch fine cable with a small coin pendant. Low maintenance, no focal piece competition. Works with anything.
- Casual weekend (3-piece): 16-inch snake chain + 18-inch butterfly clavicle chain + 22-inch rope. The snake and rope create texture contrast; the butterfly charm sits in the middle as the focal point.
- Office-appropriate (3-piece): 16-inch cable + 18-inch simple bar pendant + 22-inch paperclip chain. Subtle enough for a meeting, interesting enough to notice. Keep metals matching for a polished read.
- Date-night/dressy (3-piece): 16-inch delicate chain + 18-inch druzy stone drop + 22-inch gold rope. The stone pendant is the anchor; the other two chains frame it without competing.
- Chunky + dainty contrast: 16-inch fine cable + 22-inch thick curb chain. Just two pieces, but the weight contrast is dramatic. Skip the mid-layer here — the gap between the two is the design.
- Beads + metal mixed material: 16-inch pearl strand + 18-inch gold cable + 22-inch paperclip. The pearl strand adds softness and a different material texture that reads intentional next to metal chains.
- Mixed metals done right: 16-inch gold snake chain + 18-inch silver pendant + 22-inch gold rope. Two gold pieces, one silver accent. The silver pendant is the focal point; the gold frames it on both sides.
Browse Diamondsbydaisy’s crystal and celestial pendant collection for focal pieces that fit stacks 4 and 7 above.
What should you look for when buying necklaces for layering?
Material choice determines how long a piece lasts and how much care it needs. Here’s the honest tradeoff:
- Sterling silver (925): Affordable, durable, tarnishes with exposure to air and moisture. Polishes back easily. Best for everyday wear if you’re willing to clean it.
- Gold vermeil: Sterling silver base with a thick gold plating (at least 2.5 microns). More durable than gold-plated brass. Avoid water and chemicals to extend the plating life.
- Gold-filled: A mechanical bond of gold to a base metal. More durable than vermeil for daily wear. Holds up better to sweat and moisture.
- 14k solid gold: 14k balances durability and price and resists bending better than 18k for fine chains under 1.5 mm. The investment piece option. Doesn’t tarnish.
Clasp and adjustability checklist:
- Lobster clasps for heavier chains or pendants; spring rings for lightweight pieces only.
- Extender chains (2–3 inches) give you flexibility across necklines and outfits.
- Adjustable station necklaces let you change the drop length without buying a second piece.
Authenticity and quality signals:
- Look for hallmarks stamped on the clasp or chain (925 for sterling, 585 for 14k, 750 for 18k).
- For diamond pendants, ask for a certificate or grading report.
- Check the return policy before buying. A brand confident in its quality offers at least 30 days.
Budget expectations: A solid everyday stack of three pieces in sterling silver or gold vermeil typically runs $60–$150 total. A step up to gold-filled or 14k solid gold pieces for the same three-piece stack ranges higher. Investment stacks with solid gold and a diamond pendant are a longer-term purchase.
Diamondsbydaisy curated layering picks that follow the recipe
Diamondsbydaisy curates each piece with the layering recipe in mind: distinct lengths, varied textures, and materials that hold up to daily wear.
- Dainty Sterling Silver Bead Chain Necklace: A clean, textured base layer that sits at 16 inches and pairs with almost any mid or long chain. The bead texture contrasts with flat snake or cable chains above and below it.
- Gold Druzy Drop Necklace: The focal piece for a dressy or boho stack. The stone pendant sits naturally at mid-length and draws the eye without overwhelming the supporting chains. Pair it with a dainty base chain and a fine rope anchor.
- Sterling Silver Butterfly Necklace: A clavicle-length charm chain that works as a base or mid-layer. The butterfly charm adds a focal point without the weight of a stone pendant, making it a good choice for a lighter everyday stack.
- Everyday gold chains and layering sets: Diamondsbydaisy’s everyday gold collection includes chain options across the key layering lengths. Buying complementary pieces from the same collection keeps metal tone consistent and takes the guesswork out of matching.
Each of these pieces follows the recipe: distinct length, a defined role in the stack (base, focal, anchor), and a material that holds up to regular wear. For a coordinated full look, the Pearl Necklace with Heart Pendant adds a mixed-material option for the mid-layer in a dressy stack, and the brand’s stacking bracelets complete the look at the wrist.
The one thing most layering guides get wrong
Most necklace layering advice focuses entirely on aesthetics — mix metals, vary textures, pick a focal piece. That’s all correct. But it treats layering as a purely visual exercise and ignores the mechanical reality: a stack that looks beautiful in a photo can be a tangled mess after two hours of wear.
The spacing rule (2 inches between lengths) isn’t a style preference. It’s a physical requirement. Chains that share the same plane will always migrate toward each other during movement, regardless of how different they look. The texture and weight variation rules exist for the same reason: a heavier chain below a lighter one stays put because gravity is doing the work.
The implication for buying is that a beautiful chain with a flimsy spring ring clasp is a liability in a layered stack. Daily motion stresses clasps more than single-chain wear, and a lost pendant from a failed clasp is a real cost. Prioritize lobster clasps and solid construction before you prioritize aesthetics.
Layering is worth doing well. A three-piece stack in quality materials with proper spacing looks better at the end of the day than it did in the morning. A poorly constructed one looks worse.
Ready to build your stack with Diamondsbydaisy?
Diamondsbydaisy takes the guesswork out of building a layered look by curating pieces that are already matched for length, texture, and metal tone. Instead of sourcing three separate chains from different places and hoping they work together, you get pieces selected to complement each other from the start.

The everyday gold collection covers the key layering lengths in gold-toned chains, and the sterling silver and diamond range offers investment-quality focal pieces for a stack you’ll wear for years. Browse the full collection at Diamondsbydaisy and use the length and texture guidance from this article to pick your base, focal, and anchor pieces with confidence.
Sources
These are the primary sources used for length, spacing, anti-tangle, and buying guidance in this article. They’re worth reading if you want to go deeper on any specific point.
- How To Layer Necklaces (2026 Guide) | TheCaratCut
- How to Layer Necklaces
- How to layer necklaces without tangling, a practical guide | Prism News
Recommended
- Tips for Buying Vintage Style Jewellery: A 2026 Guide – Diamonds by daisy
- Order Custom Vintage Inspired Jewellery: A Complete Guide – Diamonds by daisy
- Dainty Sterling Silver Bead Chain Necklace – Layering Necklace | Diamonds by Daisy – Diamonds by daisy
- Modern Ways to Style Vintage: A Contemporary Guide – Diamonds by daisy